Monday, May 31, 2010

Fresh Fruit Tart


Happy Memorial Day!!! Yay summer is OFFICIALLY here.  However, living in Arizona the heat and sun has made it feel like summer since the middle of April. You would think that since I was born and raised here that I would be used to the heat.  That I would be used to the fact that most years we see 100 degrees by the end of April.  That come the middle of May stepping outside means you start to sweat instantly.  That the only way to escape the heat is to stay inside where you have the comfort of the air conditioner.  That come July it is STILL 100 degrees at midnight. Like I said, you would think I’d be used to all of that, but I’m not. 
I have an extreme love/hate relationship with Arizona.  From November to March I LOVE this state, but come April to October, Arizona makes it extremely hard for me to love her.  The only thing that keeps my sanity is knowing that the cool weather is only about a two hour drive away.
Any ways.  I’ll stop my rambling and tell you about what I made.  My mother’s birthday was last weekend, and instead of making her a birthday cake, I made her a fresh fruit tart. 


My oh my was it delicious.  It was the perfect ending to a family bbq in honor of my mother.  This tart is oh so delicious. It’s the perfect summer treat.  Go. Make it. You’ll love me for it.
Like most fruit tarts, this recipe had a glaze, but I didn’t use it.  I think that the glazes take away from the flavor of the fresh fruit and add too much sugar.  Plus this specific glaze wasn’t very tasty.  However, if you do want to try it with the glaze then click here.
Fresh Fruit Tart
(Recipe from Paula Deen)

Ingredients:
Crust:
                        ½ cup powdered sugar
                        1 ½ cups all-purpose flour
                        1 ½ sticks unsalted butter, sliced and softened
            Filling:
                        1 - 8oz package of cream cheese, softened
                        ½ cup granulated sugar
                        1 teaspoon vanilla extract
                        2 teaspoons lime zest
            Toppings:
                        Strawberries
                        Raspberries
                        Blueberries
                        Kiwis
                        Whatever your heart desires

Directions:

Preheat the oven to 350F. In a food processor, combine the flour, powdered sugar, and butter until the mixture starts to pull away from the sides and form a ball.


Then dumb the dough into an 11inch tart pan (with a removable bottom).  Using your fingers, press the dough all along the bottom and along the sides of the tart pan.  Make it as even as possible so it cooks evenly in the oven.  Bake for 10-11 minutes; the crust should be a light brown when it is down. Set aside and let the crust cool.


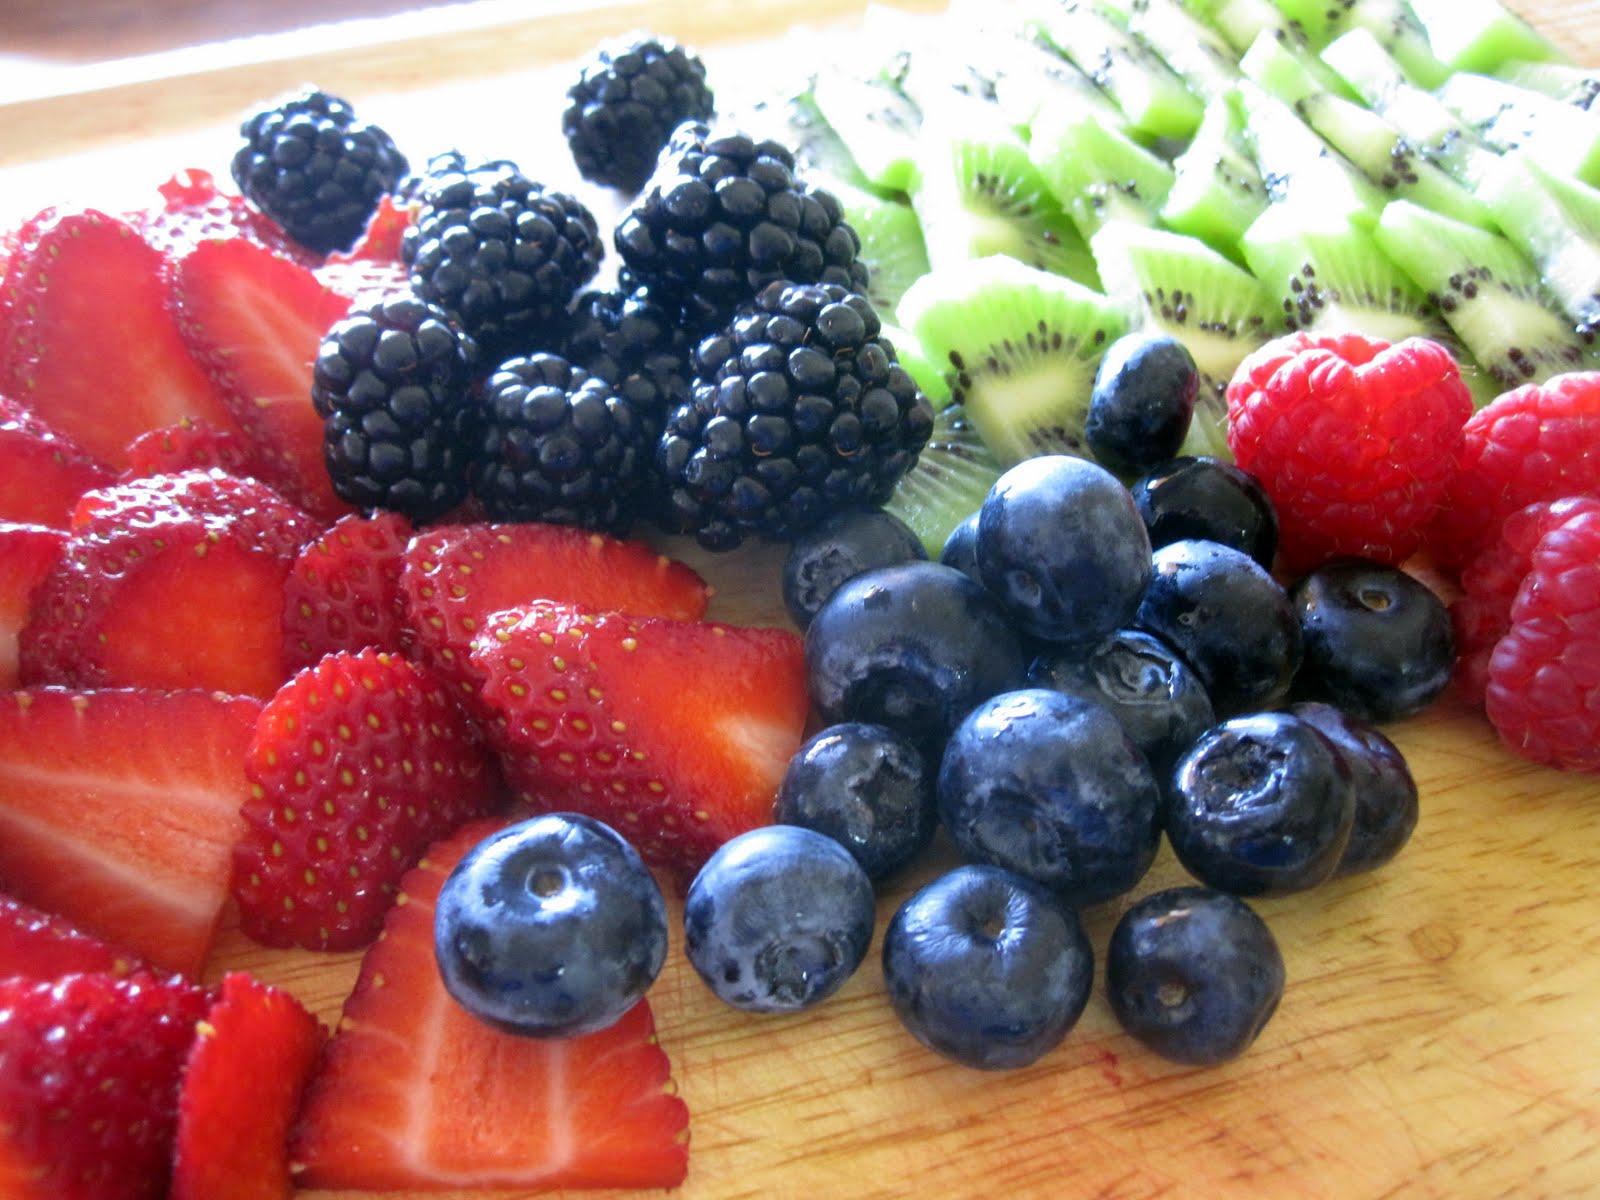
While the crust is cooking you can prep all of your fruit.  Wash the berries, cut what needs to be cut, and get it ready for assembly.   


Then, using a mixer beat together the cream cheese, sugar, vanilla, and lime zest until it is smooth.  The filling should look fluffy and creamy.  Spoon the filling into the tart crust and spread evenly.


Then assemble your fruit tart however you would like.  Just make sure it looks pretty. :)


Once the tart is assembled place it in your fridge until 20 minutes before you are ready to serve it. Then eat it outside, on your porch, with the people you love the most.


Thursday, May 13, 2010

Pretzels


Since summer is right around the corner, and my boyfriend just LOVES these things, I thought I'd try my hand at baking some pretzels. My friend Kate kept telling me that Alton Brown’s recipe was so simple and so easy that I just HAD to make them. So, a couple months later I finally gave in and made these bad boys.
I don’t think I can stress enough how easy making these were! Seriously, everything happened so fast. One minute I was making the dough, then the next minute I was devouring a delicious, warm, salty pretzel. Now this might sound weird to you, but I’ve always thought soft pretzels have a very distinct taste to them, and for some reason I never could figure it out. Until I made them at home. The specific flavor soft pretzels have come from their dip in the baking soda jacuzzi.


Intense. I swear it’s a hot tub for pretzels.

My boyfriend wants me to make some kind of gooey, cheesy dipping sauce for them, but I think they are delicious just the way they are. Fresh out of the oven. This recipe makes a total of eight pretzels, and their shelf life is about a week.

Pretzels
(Recipe from Alton Brown)

Ingredients:
1 ½ cups warm water ( 110 to 115F)
1 tablespoon sugar
2 teaspoons kosher salt
1 package active dry yeast
22 ounces all-purpose flour, approximately 4 ½ cups
2 ounces unsalted butter, melted
Vegetable oil
10 cups water
2/3 cup baking soda
1 large egg yolk beaten with 1 tablespoon water
Pretzel salt (kosher salt)

Directions:

Combine water, sugar, and kosher salt in the bowl for your mixer. Sprinkle the yeast over top of it; let is sit for 5 minutes (the mixture should begin to get foamy).


Then add the flour and melted butter. Using a dough hook mix the ingredients together at a low speed until it is well combined. Then increase your speed to medium and knead for about 5 minutes. The dough should be smooth, and it should pull away from the side of the bowl.


Oil a bowl, place the dough inside of it, cover with plastic wrap, and let is sit in a warm place for 50 – 55 minutes*


Preheat the oven to 45F. Line two baking sheets with parchment paper and oil.

Now it’s time to make the baking soda jacuzzi. Bring 10 cups of water and the baking soda to a boil in a roasting pan.

While the jacuzzi is getting hot it’s time to make the pretzels. Divide the dough into eight pieces.


Roll each piece into a 24inch rope. Then, make a U shape with your rope. Next, take the ends of the pretzel, cross them, and then place them under the U shape. You should have something that looks like a pretzel.


Place pretzels in baking soda jacuzzi for 30 seconds. Then place them on your lined and oiled baking sheets. Brush the top of the pretzels with the egg wash, and then sprinkle with salt. Bake for 12-14 minutes.


Move them to a cooling rack, and let the pretzels sit for 5 minutes. Then enjoy eating your pretzels with a cute boy.


* I always let my dough rise in the oven with a bowl of hot water place directly underneath it. It works every time.

Monday, May 10, 2010

Easy Brownies


(Blogger is being difficult. Sorry if some of my formating looks weird.)

I like to think that it is the simple things in life that make me happy.

Like dancing in pretty green grass.

Big puffy clouds.

 Red nail polish.

Hearing my nephew laugh. It's oh so precious.


BevMo 5cent wine sales.  (I get to purchase my favorite champagne by the boat loads! What isn'tthere to like about that!?)

Planting a garden.


And last, but not least, having a delicious brownie for breakfast.


These brownies are the perfect balance between a cake brownie and a fudge brownie.  They are thick like a cake brownie, but when you bite into them the centers are gooey and fudge like.  And the batter!  Oh man, it's one of those batters that you find yourself licking the bowl clean because it's just so darn good!
Evidence:
These brownies are a chocolate lovers match made in heaven because they get topped with an equally delicious chocolate frosting.  So creamy, so silky, SO GOOD.  It might be chocolate overload, but it's okay, just make sure you have a giant glass of milk by your side to wash the brownies down with. This is the easiest brownie recipe EVER. So, no excuses people. Get your butts in the kitchen are start baking!        Easy Brownie Recipe:        (Adapted from Hershey's Best Brownies Recipe       Ingredients:        1 cup (2 sticks) butter, melted      2 cups sugar        2 teaspoons vanilla extract    4 eggs        1 tablespoon coffee       2/3 cup Cocoa Powder (I like to use Hershey's)        1 cup all-purpose flour      1/2 teaspoon baking powder   1/2 teaspoon salt
Directions:    Preheat the oven to 350°F.  Then grease a 13x9x2 glass* baking pan. In a medium size bowl, sift together the flour, cocoa powder, salt and baking powder.    
In a large bowl, whisk together to sugar, vanilla, coffee, and melted butter. Add the eggs and beat until combined. Then slowly add the dry ingredients a little at a time; beating well until everything is incorporated.    
Bake for 25 minutes at 350F.  Then lower the oven to 325F and bake for another 10 minutes.**    
Creamy Chocolate Frosting:    (From Hershey's best Brownies Recipe     Ingredients:    6 tablespoons butter, softened    6 tablespoons cocoa powder      2 tablespoons honey      1 teaspoon vanilla extract    2 cups powder sugar      4 tablespoons milk      Directions: Combine butter, cocoa powder, and honey.  Then beat in the two cups of powder sugar.  Lastly, add the milk and beat until incorporated.  Frost Brownies. EAT BROWNIES.  
* Every time I've ever made them in a metal baking pan they don't cook all the way through. The edges are burnt and crunchy and the middle is still batter like.   ** It makes them turn out pefect EVERY TIME.

Thursday, May 6, 2010

Baking To Do List:

Sorry guys for not posting anything this week.  My birthday was last week, and I am one of those people who tend to have a birthday week instead of just a birthday (even though I hate celebrating the fact that 30 is quickly approaching).  There were family parties where I got to dance in bubbles with my niece and nephew.


There was a surprise wine tasting dinner with my boyfriend alex.


There were lots of good eats and a hike up camelback.


There was even a night with my friends on Mill Ave.


As you can see I didn't really have any time to bake anything, so with that said here is my baking to do list. I PROMISE the baking will resume this weekend. :)

Baking To Do List:
-Pretzels
-Chocolate Brownies
-Lemon Cake with Blueberry Compote
-Round 2 of the Avocado Cake (damn you round one.)
-My Favorite Chocolate Chip Cookie
-Cupcakes of some sort

That's my list of things that MUST be baked a.s.a.p.  Please be patient, and I promise that there will be a new post up shortly with some delicious combination of butter & sugar that make your heart mealt and your taste buds smile. :)

Oh. Maybe you should make your beautiful mother a yummy cake for mother's day. I bet she'd love it if you did. :)

Wednesday, April 28, 2010

Guest Post: Pierogi


Hey guys!  I thought it would be fun to start having one guest post a month from my friends and family members - that way you guys don't get bored with my ridiculous posts where I just ramble on with my life! The first guest post is by my friend Kate. Enjoy! 

I would never consider myself a great cook, baker, or writer, so when Samantha asked me if I wanted to do a guest post here, I was filled with mixed emotions. What if nobody liked what I cooked? What if I ended up ruining the dish I made? Considering I only really started experimenting with baking about two years ago, I realized that I needed something that would make me at ease.

Growing up, my Buscia (Polish for grandma) would cook pierogi on special occasions (for those of you who have never heard of pierogi, think of a hybrid between ravioli and potato dumplings). For my Buscia, cooking pierogi was always a labor of love; something that would take an afternoon in the kitchen, hand rolling and stuffing little dough envelopes. She would usually make them for Sunday dinners, where her children, grandchildren, and great-grandchildren would gather for a big home cooked meal.

These pierogi embody comfort food, both in their heartiness and the fact that they require an act of love to make for someone (they do take a bit of time to make and assemble). If making for a family dinner, feel free to make the dough ahead of time and refrigerate until you are ready to stuff them. Although pierogi can be stuffed with a multitude of fillings, I prefer the traditional blend of cheese, potatoes, and onions. I also recommend serving with sour cream or (my favorite) cream cheese.

While these pierogi can in no way compare to my Buscia’s, they are still delicious. I recommend cooking up a batch of these for someone you love, whether it is your spouse, friend, or family. I even made a few without onions for our three pups. (They gobbled them up so quickly I could barely get a picture of them!)


Homemade Pittsburgh Pierogies with Sour Cream
(Recipe courtesy Columbus Foodie)

Ingredients:
2 cups flour, plus extra for kneading and rolling dough
1/2 teaspoon salt
1 large egg
1/2 cup sour cream, plus extra to serve with the pierogi
1/4 cup butter, softened and cut into small pieces
butter and onions for sautéing
ingredients for filling of your choice (potato & cheese filling recipe below)


Preparation:

Pierogi Dough
To prepare the pierogi dough, mix together the flour and salt. Beat the egg, and then add all at once to the flour mixture. Add the 1/2 cup sour cream and the softened butter pieces and work until the dough loses most of its stickiness (about 5-7 minutes). You can use a food processor with a dough hook for this, but be careful not to overbeat. Wrap the dough in plastic and refrigerate for 20-30 minutes or overnight; the dough can be kept in the refrigerator for up to 2 days.


Prepare the Pierogies
Roll the pierogi dough on a floured board or countertop until 1/8″ thick. Cut circles of dough (2″ for small pierogies and 3-3 1/2″ for large pierogies) with a cookie cutter or drinking glass. Place a small ball of filling (about a tablespoon) on each dough round and fold the dough over, forming a semi-circle. Press the edges together with the tines of a fork.


Boil the pierogies a few at a time in a large pot of water. They are done when they float to the top (about 8-10 minutes). Rinse in cool water and let dry. Sauté chopped onions in butter in a large pan until onions are soft. Then add pierogies and pan fry until lightly crispy. Serve with a side of sour cream for a true Pittsburgh pierogi meal.


Homemade Pierogi Tips:
If you are having a hard time getting the edges to stick together, you may have too much flour in the dough. Add a little water to help get a good seal.
If you don’t want to cook all of the pierogies right away, you can refrigerate them (uncooked) for several days or freeze them for up to several months.
You can fill pierogies with pretty much anything you want, though potato and cheese is the most common (recipe below). Sweet pierogies are often filled with a prune mixture.

Potato, Cheese & Onion Filling:
Peel and boil 5 lbs of potatoes until soft. Red potatoes are especially good for this. While the potatoes are boiling, finely chop 1 large onion and sauté in butter until soft and translucent. Mash the potatoes with the sautéed onions and 8oz of grated cheddar cheese, adding salt and pepper to taste. You can also add some fresh parsley, bacon bits, or other enhancements if you desire. Let the potato mixture cool and then form into 1″ balls.

Sunday, April 18, 2010

Blueberry Poppy Seed Cake


I DID IT! Yesterday I woke up at 4:45am to get ready for my first race! I was so excited and so nervous when I woke up I couldn’t really eat, but I forced myself too. Then I quickly got ready, picked up my friend Lauren, and headed to ASU to meet up with about 30,000 other runners to run 4.2 miles in honor of Pat Tillman. Let me tell you this: IT WAS AWESOME. My official time was 49:23, that’s about an 11:46 mile – my fastest time yet! My friends Lauren and Charles ran with me too.


We tried to stay together, but eventually all got separated. When I started running by myself I started to talk to my feet (I needed something to get my mind off how bad my knees hurt). I just kept telling them “You can do this!” and “Come on feet! Take me places!” A little bit crazy? Yes. But did it help? Yes. I also liked running in an actual race because having people pass me pushed me to run faster so that I could pass someone else. I think that’s why my time was faster than it normal is. All I know is that It was the best feeling in the world to cross the finish line and feel SO ACCOMPLISHED. My knees were killing, my body was dehydrated, my feet wanted me to sit down, but for the first 10 seconds after I crossed the finished line none of that matter because I accomplished my goal! GO ME!


So to reward myself for my awesome run yesterday I decided to make this oh so delicious blueberry poppy seed cake and eat TWO pieces as soon as it was done! This recipe is originally from Joy the Baker, but I adapted it slightly. I cut out some of the oil and added some Greek yogurt. Instead of making a blueberry glaze, I added the blueberries into the actual cake and then made a lemon glaze on top. SERIOUSLY. LEMON AND BLUEBERRY ARE THE BEST FLAVOR COMBINATION EVER. It’s my favorite. It should be yours too. I also think you should get your butts in the kitchen and make this recipe as soon as you are done reading my post! Deal? Deal.


(Beware I got a little picture happy with this recipe.)

Blueberry Poppy Seed Cake
(Adapted from Joy the Baker)

Ingredients:
2 ½ cups all purpose flour
1 ½ cups sugar
1 teaspoon baking soda
1 teaspoon salt
1 cup canola oil
1/3 cup Greek yogurt*
1 cup buttermilk
2 eggs
1 teaspoon white vinegar
1 teaspoon vanilla
2 tablespoons poppy seeds
2 – 2 ½ cups fresh, or frozen, blueberries

Directions:
Preheat oven to 325F**. Grease and flour a ten inch bundt cake pan. Then, in a large bowl whisk together flour, sugar, salt, and baking soda. Set Aside

In a medium bowl combine oil, Greek yogurt, buttermilk, eggs, vinegar, and vanilla. Then add the wet ingredients to the dry ingredients and mix until there are no lumps in the batter.

Then fold in poppy seeds.


Then fold in blueberries.


Bake 325F for 1hr 15 mins – 1hr 25mins***. Let cool completely in bundt cake pan.


Once cooled, release cake from pan by flipping it over. Then glaze the cake with a mix of powdered sugar and freshly squeezed lemon juice (about 1 cup powdered sugar, 2 tablespoons lemon juice). THEN DEVOUR!


Notes:
*You can use plain yogurt if you like, I just prefer Greek yogurt. You could even use the original 1 1/3 cup canola oil if that is all you have
**&*** The original recipe says the cake should be baked at 325 fro 35-45 minutes. Mine took a lot longer than that. I don’t know if it was because of the Greek yogurt, the frozen blueberries, or just because I was too excited to keep the oven door shut. So your cooking time may very. Also, trying baking the cake at 350 for a less amount of time. Let me know what worked best for you!